Chapter 3: Post-Production DaVinci Resolve
In This Lesson
Our comprehensive lesson set guides you through setting up organized project folders, importing and organizing media, creating backups, and managing cache efficiently. Learn collaboration techniques, troubleshooting methods, and best practices to elevate your video editing capabilities in DaVinci Resolve. Streamline your process and enhance your productivity with our media management lessons

Welcome to Lesson 1 of our DaVinci Resolve optimization series. In this lesson, we'll guide you through the art of creating an efficient file structure and media management system. The primary goal is to help you organize your files after shooting, making your editing process smoother and more enjoyable.
1. Understanding the File Structure:
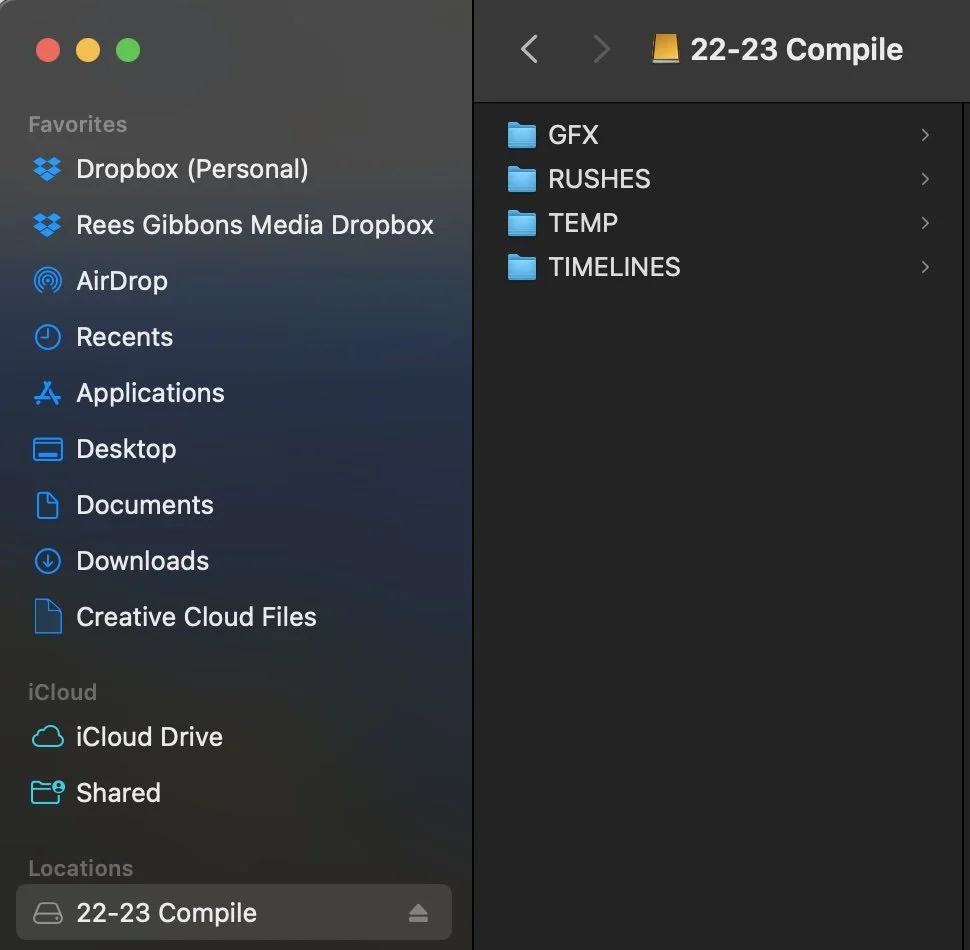
Let's start by understanding the backbone of my organized workflow. You can create structure you want but this is what I find works best for me. You'll learn about the four essential folders that will revolutionize your DaVinci Resolve experience. To keep things simple we'll delve into each one and explore their unique purposes, ensuring you know where each type of file belongs.
RUSHES: This is your digital raw footage repository, where unedited video files reside. You'll become adept at categorizing and filing your raw video data here.
TIMELINES: In this folder, you'll manage your edited projects, product files, and timeline exports. This section ensures that your work is well-organized for easy access and retrieval.
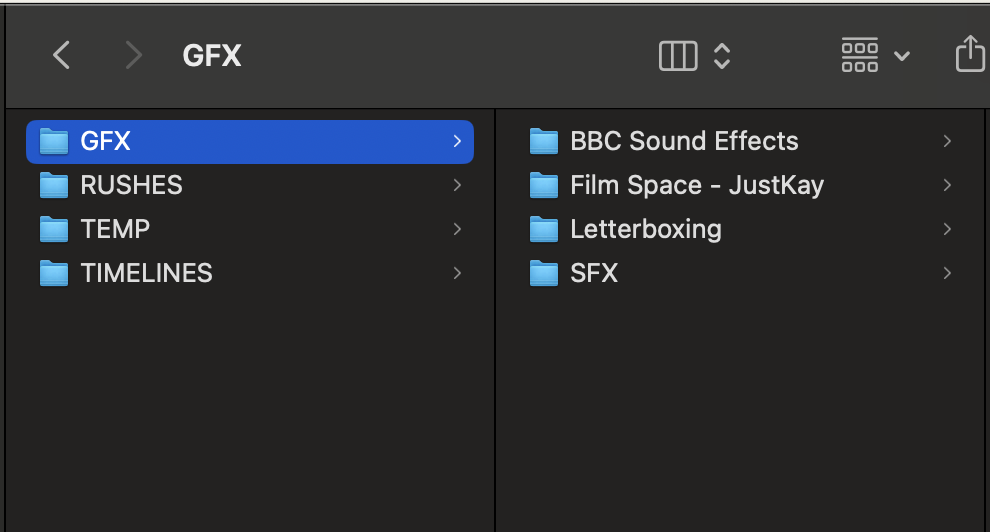
GFX (General Effects): Within this folder, you'll house a plethora of assets, including music, sound effects, titles, graphics, and everything related to special effects. It's a one-stop-shop for all things visual and auditory.
TEMP: TEMP is the catch-all for files that need sorting. It's unorganized, and nothing should linger here long term. You'll understand how to manage these temporary files effectively.


2. Benefits of an Organized Workflow:
Efficiency: With an organized file structure, your workflow becomes more efficient. You'll spend less time searching for files and more time focusing on your creative process.
Productivity: An organized workspace enhances your productivity. You can quickly access the files you need, which means less downtime and more time for editing and refining your projects.
Professionalism: Just as a baker's clean workspace reflects their professionalism, so does an organized digital workspace. Your clients and colleagues will appreciate your attention to detail and organization. Simply it just looks good.
3. Common Mistakes and Challenges:
We'll address the common mistake many editors make - not setting up an organized structure from the start. You'll realize that once you establish this structure, it becomes second nature, making your editing process a breeze.
Procrastination: One common mistake is procrastinating the setup of an organized file structure. Many editors dive into editing without a clear system in place, leading to chaos later on.
Disorganization: The challenge of disorganization arises when files are scattered, and no clear structure is maintained. This can result in confusion and a longer editing process.
4. Steps to Organize Your Files:
Now it's time to roll up our sleeves and dive into the practical side of things. You'll walk through a step-by-step process.
Main Hard Drive: Start by creating a main hard drive where your project files will reside. This drive serves as your project's central hub.
Split Into Four Folders: Divide your content into four key folders: RUSHES, TIMELINES, GFX, and TEMP. Each folder has a specific purpose and is designed to keep your project files organized and accessible.
Organize Within RUSHES: In the RUSHES folder, further organize your files by creating subfolders for each day, month, or year, or by naming the shoots. This structure ensures that you can quickly locate your raw video files.
5. Maintaining the File Structure in DaVinci Resolve:
We'll guide you through the process of keeping your files organized by simply dragging them into the Master left-hand column in the Media Page.
Simplicity: By dragging your files into the Master left-hand column in DaVinci Resolve's Media Page, you keep your workspace uncluttered and easy to navigate.
Instant Access: This method ensures that you have instant access to all your project files directly from within DaVinci Resolve, streamlining your editing process.
6. Backing Up Your Projects:
Master Drive: Create a master drive that holds all your files in an organized manner. This drive serves as your primary backup for your projects and media.
Create Selects: Use DaVinci Resolve's selection tools to choose and export the raw files or .R3d files, ensuring you have selects and backups all in one place. This redundancy provides extra security and convenience.
Conclusion:
As we wrap up Lesson 1, remember that an organized file structure and media management system will revolutionize your DaVinci Resolve workflow. It's a small investment that yields significant returns in terms of efficiency and professionalism. Implement these practices to make your editing journey smoother and more enjoyable.